The VTS includes hardware tests to verify that the peripheral devices are functioning correctly.
Hardware Tests
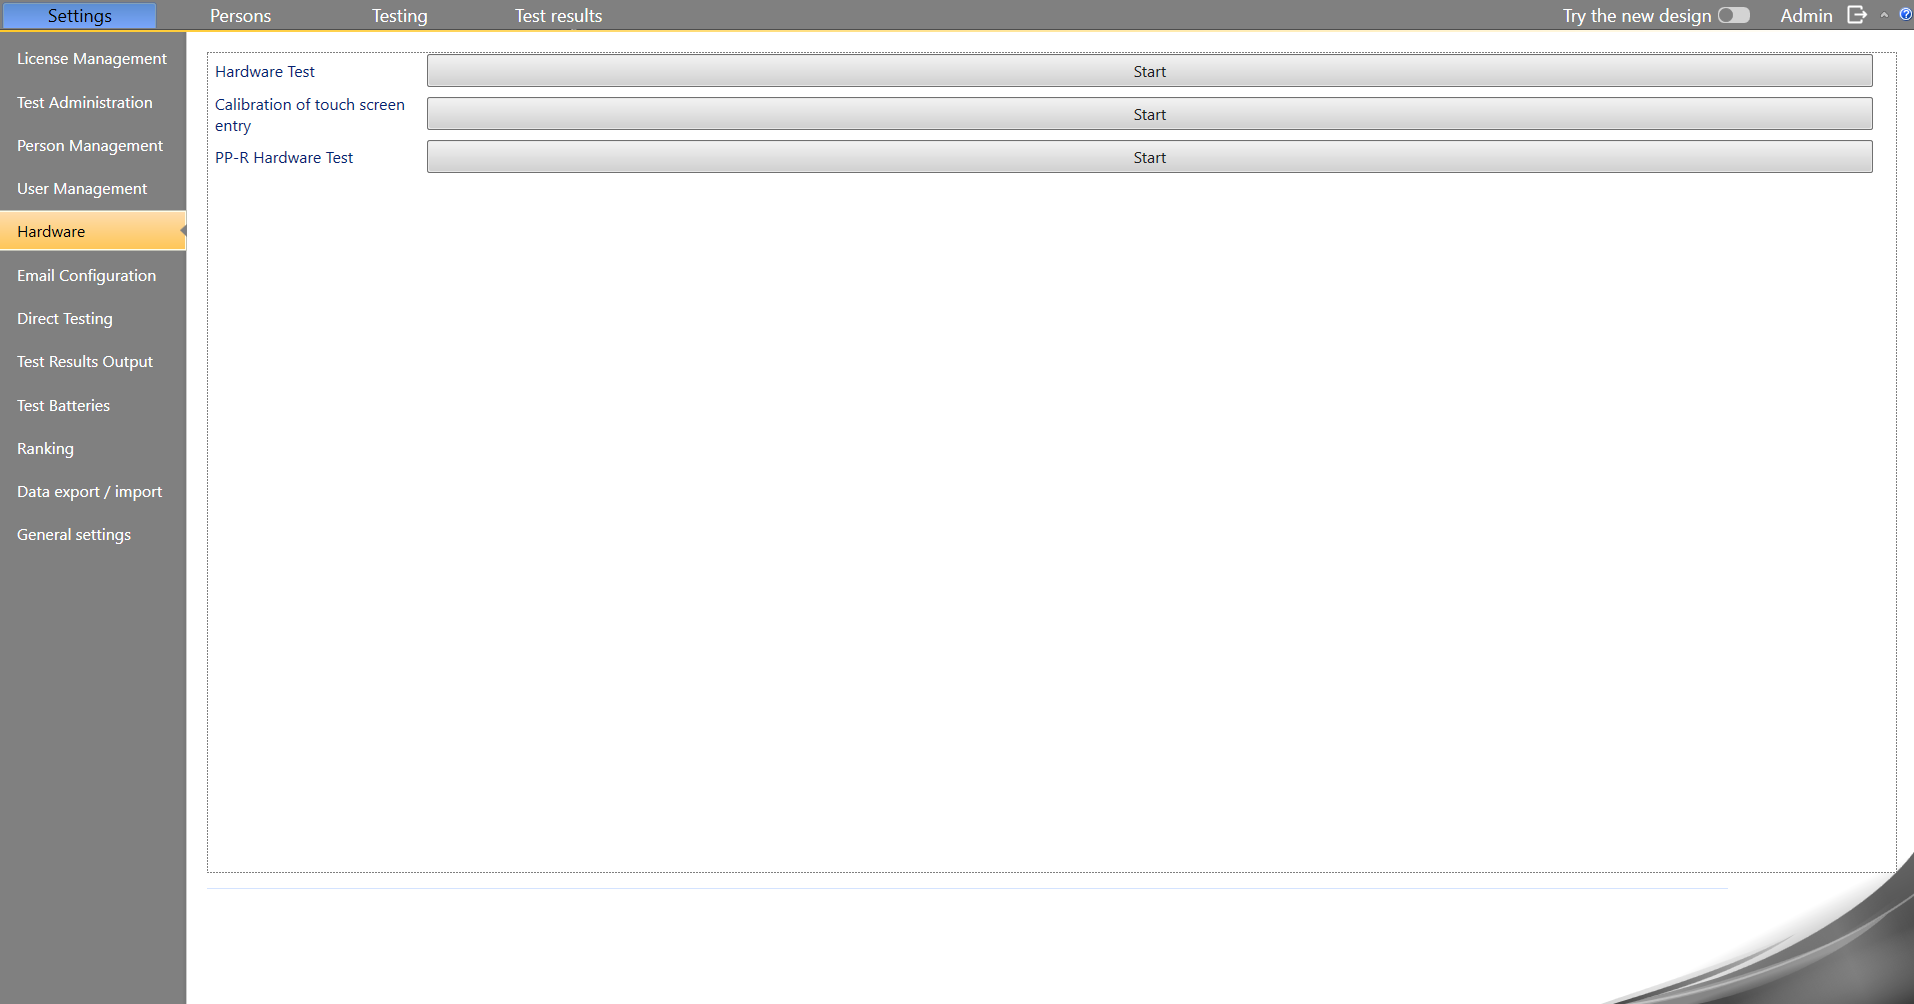
Under Settings → Hardware, you can start the hardware tests:
-
To check one of the following devices, click the Start button next to Hardware Test:
-
Response panel
-
Foot-operated keys
-
Foot pedals
-
MLS work panel
-
Flicker tube
-
Peripheral Perception (PP-HW – with serial interface and solid aluminum base plate)
-
-
To check the Peripheral Perception PP-HW2 (USB interface), select Start next to PP-R Hardware Test.
Hardware Test
Use the hardware test to check the functional suitability of the peripheral devices of the Vienna Test System after completing the installation. It is recommended to perform the hardware test quarterly or half-yearly, dependent on your quality management system. Perform the test after each change of the system configuration.
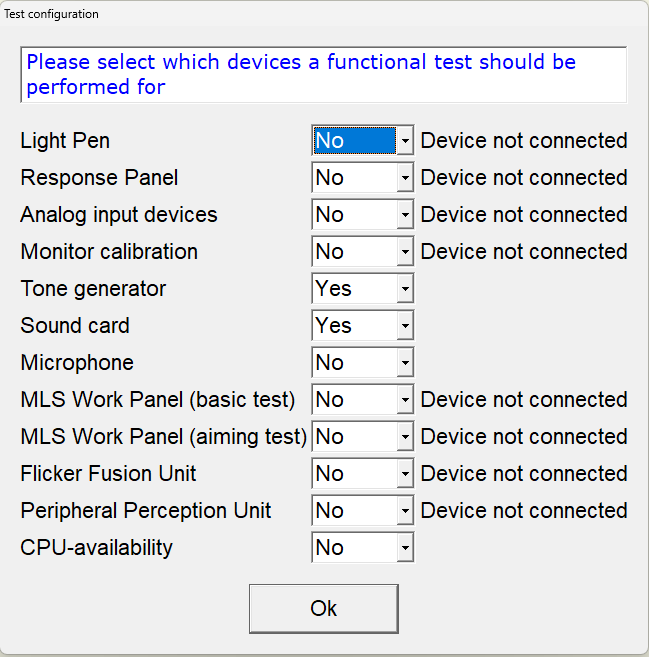
At the beginning, a window will appear showing which devices are connected. Please verify that “Yes” appears for all your devices. After clicking OK, the hardware test will start with the first device entered. Please note that the foot-operated keys are checked as part of the Response Panel test, and the foot pedals are part of the test under Analog input devices.
The program guides you through the test for each device. Please follow all indicated steps carefully. After completing all hardware tests, you can print a report as confirmation.
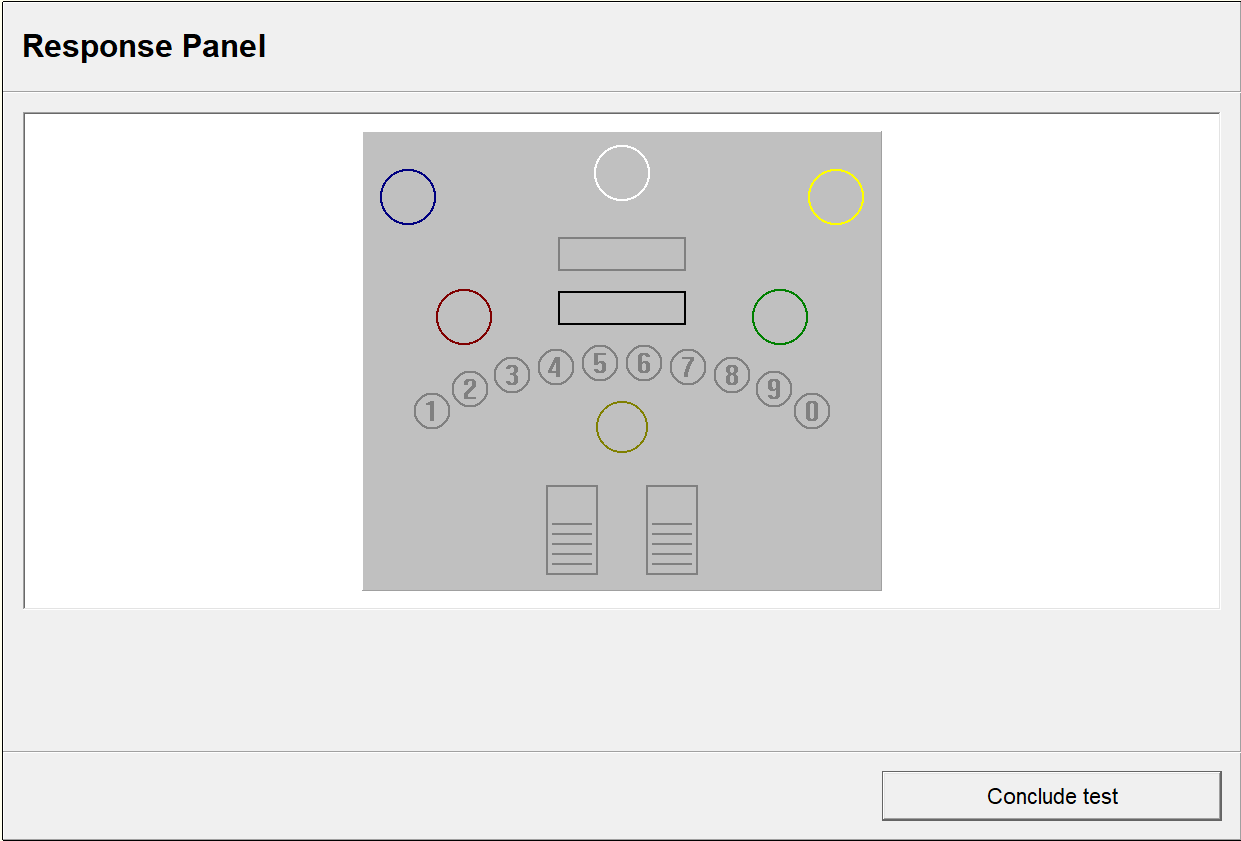
Hardware test using the example of the Response Panel
-
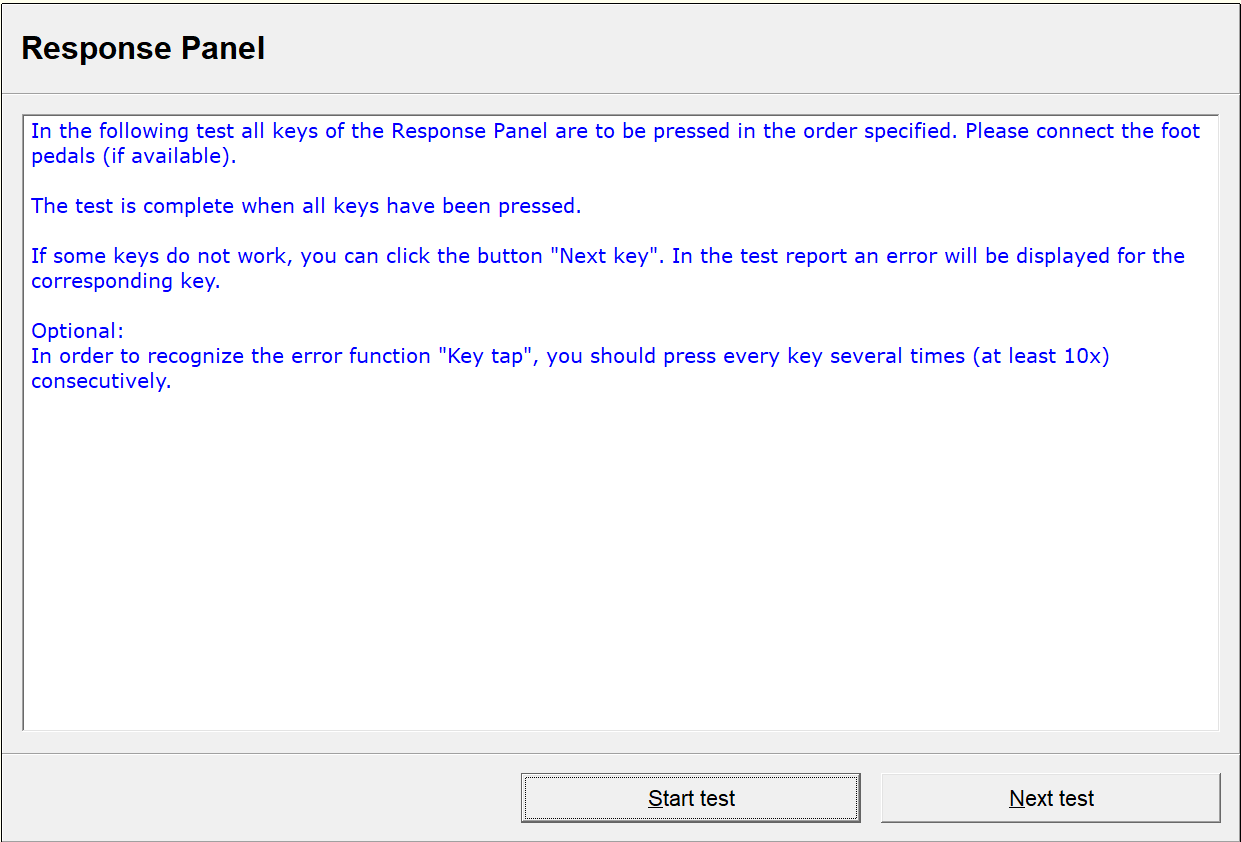
Each test begins with an introduction explaining how to perform the test. Click on Start test to begin the test. If you want to skip the test, click on Next test.
-
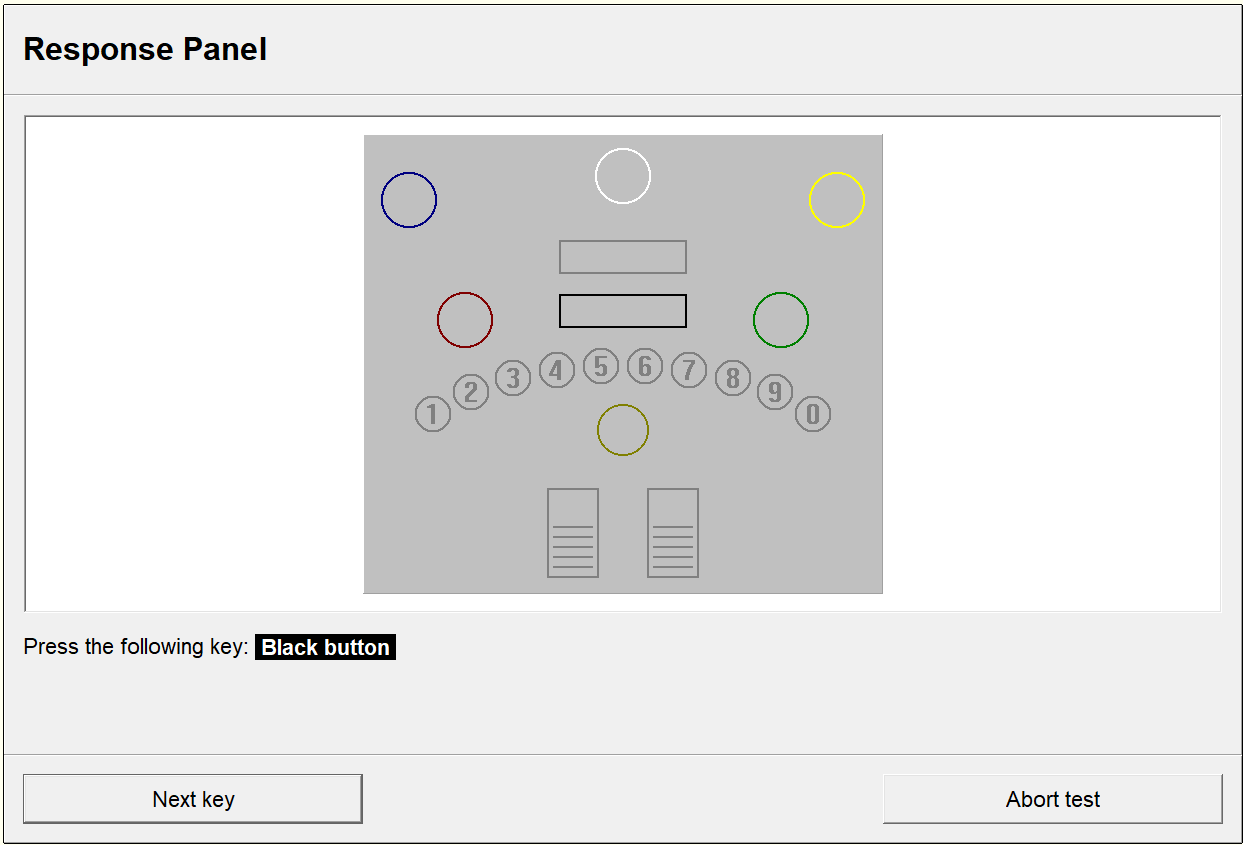
You will be asked to press the corresponding key. Once you have done this, press the next key. If a key does not work, click on Next key to skip it. Keys that are not pressed are noted in the report.
-
After the test has been completed, click Conclude test to finish it. The test for the next hardware component will then start automatically.
PP-HW2 hardware test
After starting the PP-HW2 hardware test, you will be asked to enter the HW device number and the person performing the test. The device number can be found on the device label on the back side of the LED-panels of the PP-HW2.
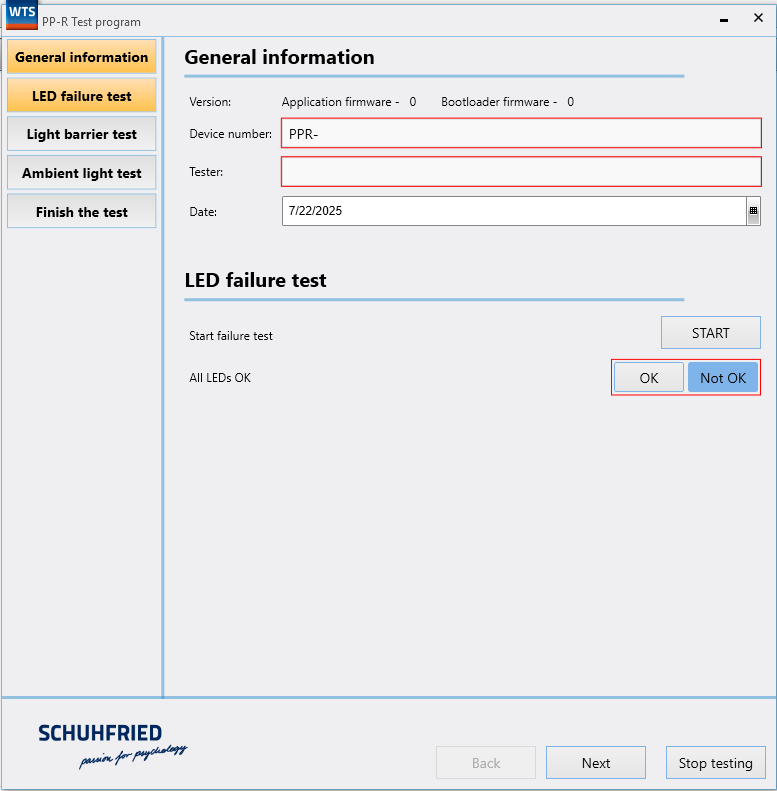
Perform the test step by step by clicking on START for each individual test and confirm with OK if the results are as expected. This means that the LED-panels are working properly and the measured ambient illumination is within the specified range (specified under Limit).
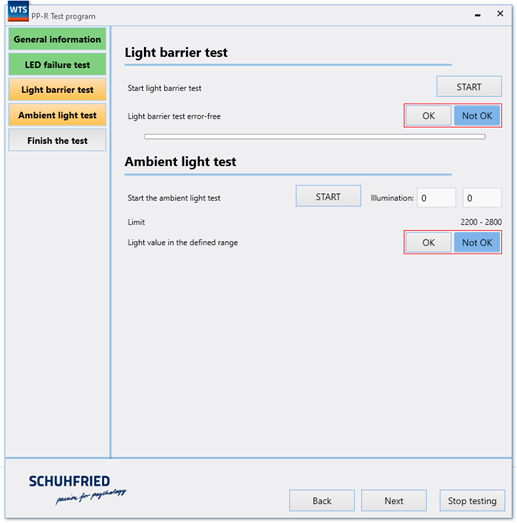
At the end, a test report can be printed.
Troubleshooting
If a peripheral device isn’t functioning properly, try the following steps to locate and resolve the problem:
-
Disconnect the device and reconnect it
-
Restart Windows
-
Connect the device to a different USB port (the device driver may need to be reinstalled)
-
Disconnect other USB devices
-
Connect the device directly to the computer without a USB hub