You can use the Test Generator to create your own test or questionnaire for the Vienna Test System (VTS). This section provides an overview of the options for creating and configuring your own tests.
How to create a test
Start by clicking on Create test in the dashboard (main page) of the Test Generator. You can select a template by selecting Create test from template. This will load a pre-configured, fully functional test that you can use or customize to your needs.

If you decide to start without a template (Create test), you will see a new test without customized settings and a blank instruction text page.
Make the necessary settings
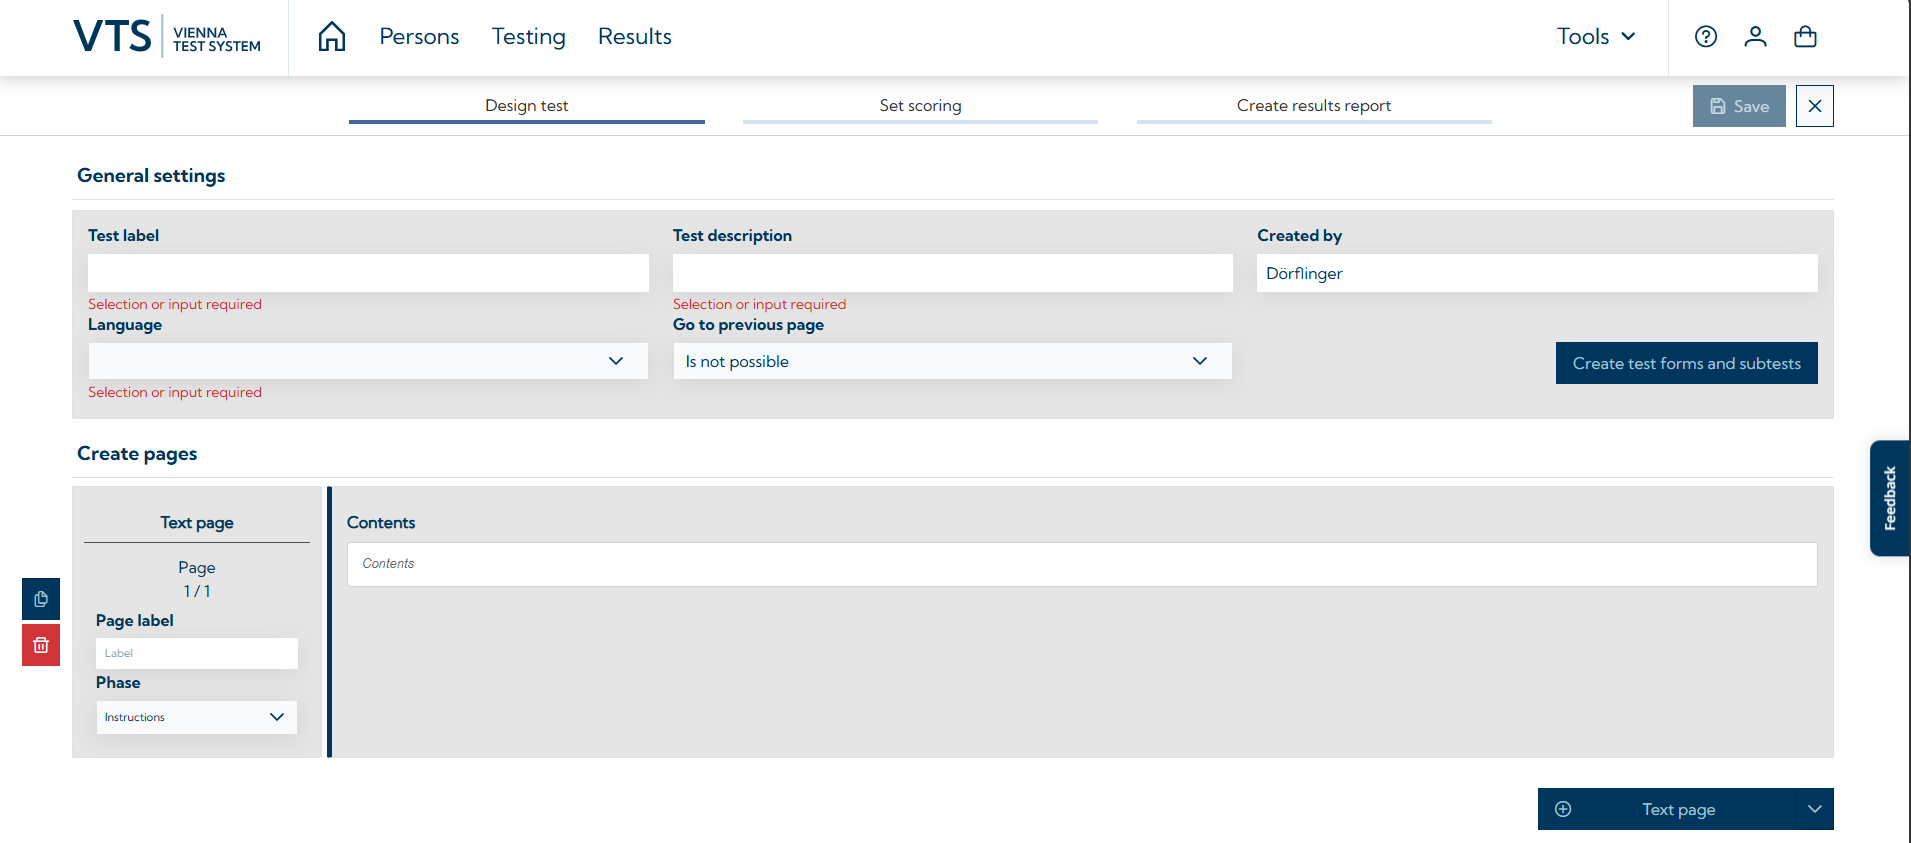
To begin with, you will find the General Settings for the test at the top. Here you can give your test a test label, add a description that will be displayed in the VTS and specify the language. The language should match the language of the test content. For example, if your content is written in German, please set it to German (de-DE), as the Vienna Test System checks whether the language of the test matches that of the respondent. You can also specify whether and how respondents can navigate back to previous pages in the test during the test phase (Go to previous page).
Attention: Please note that the test label must be unique, must begin with "TQ" and cannot be changed after the test has been saved for the first time.
Subtests and test forms
For more complex tests, additional sub-tests and test forms can be defined here (Create test forms and subtests). Test forms can be used to create different variants of a test (e.g. a short and a long form of a questionnaire). Each test form must contain at least one subtest. Test forms can be selected in the VTS (you must select which test form is to be specified). The subtests can be assigned to the test forms via drag & drop (or via the corresponding buttons with the arrows). In addition, the duration per subtest (in minutes) can be specified in this window, which is displayed to the test user in the VTS.
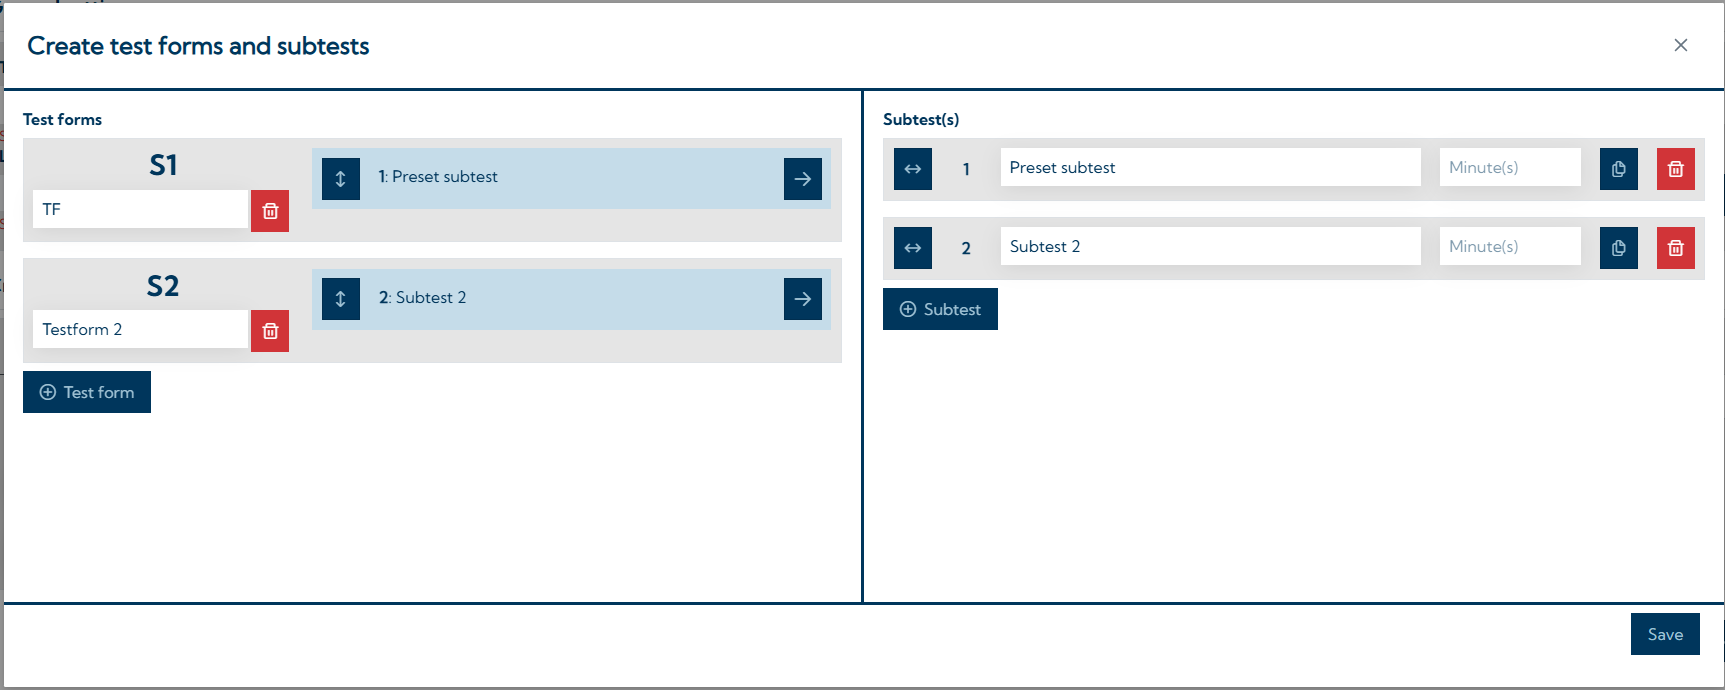
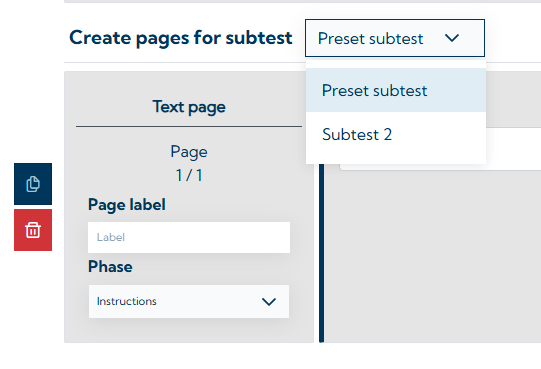
If several subtests are defined, the Design test tab can now be used to select the subtests for which test pages are to be added and edited (see the image below).
Create test pages for your test
Under General settings, in the Create pages section, you can add and configure the individual test pages for your test.
If a page is not selected for edit, a preview of how the page will be displayed in the VTS is shown (see image below). By clicking on the page preview, you can edit its content, duplicate or delete the page, and change the order.
Note: The preview of the test pages does not show exactly how the page content is displayed in the test, as this depends on the screen or window size, and this is different in preview mode than in the test.
When you add a test page, you can choose between different types of test pages. The following types of pages are available:
-
Text page
-
Single/multiple choice page
-
Free text question
-
Matrix input
Text page
This page can, for instance, serve as an introduction or instruction page. The respondent cannot enter any answers on these pages; they can only read the content and navigate. This page can also display images.
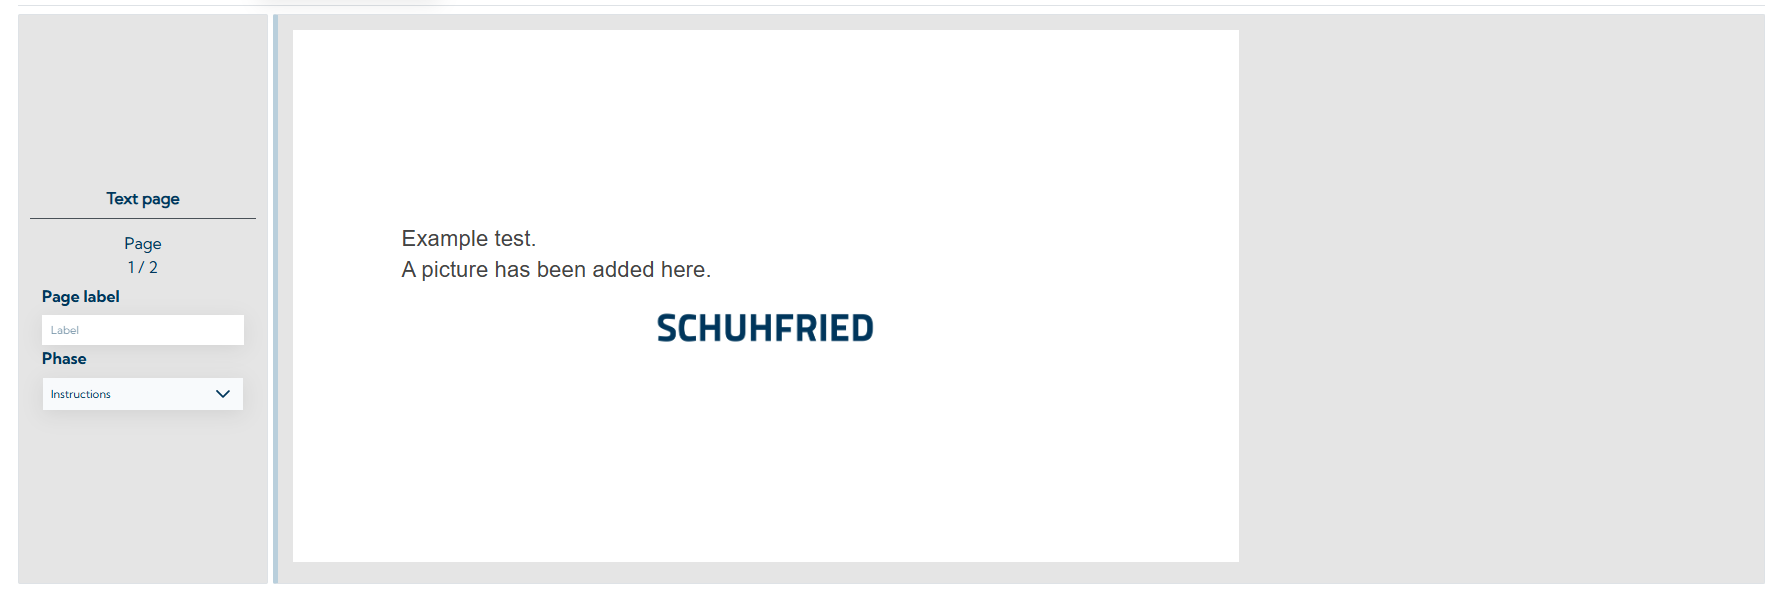
Setting options
Text and images can be added in the Content field.
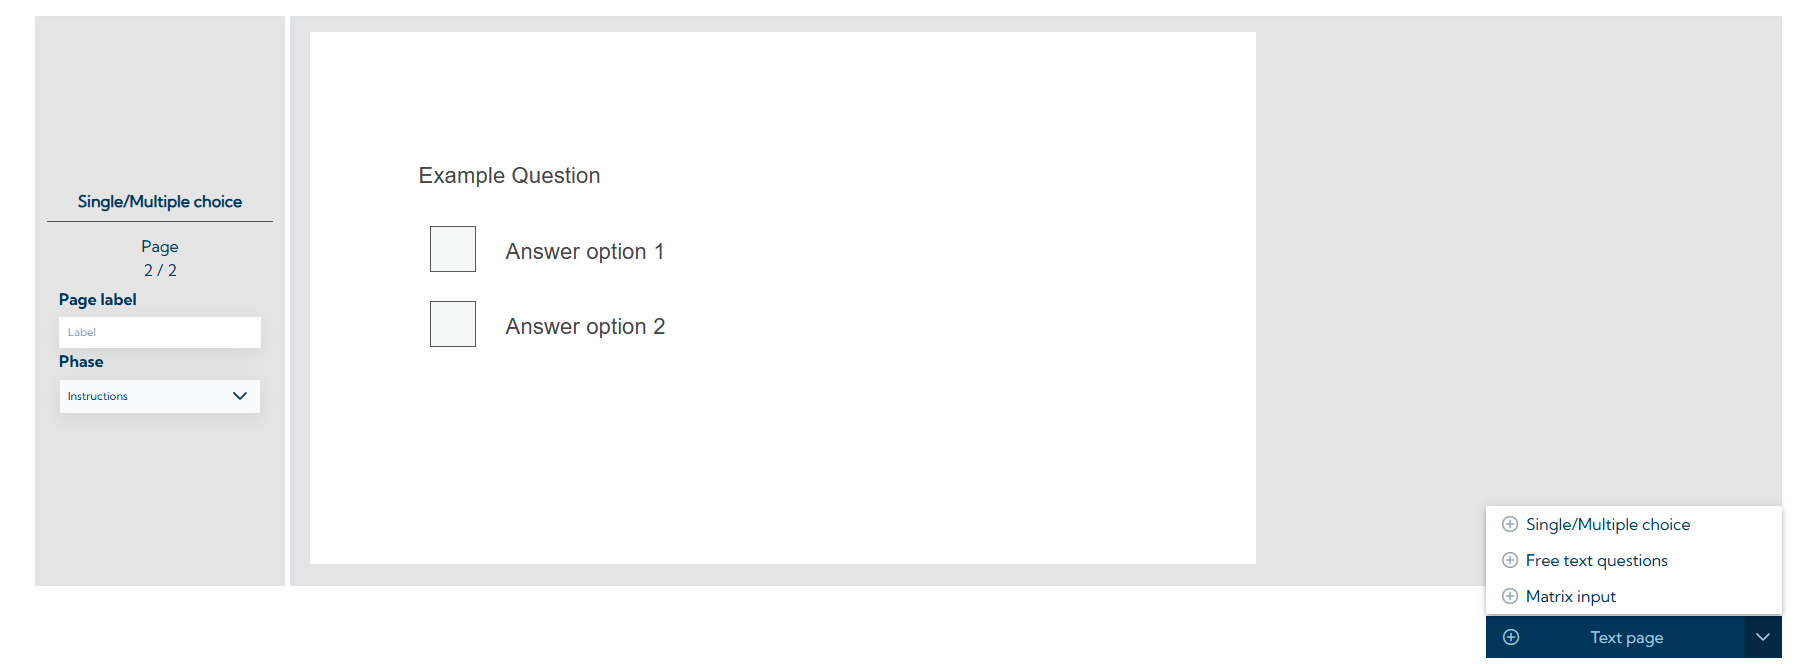
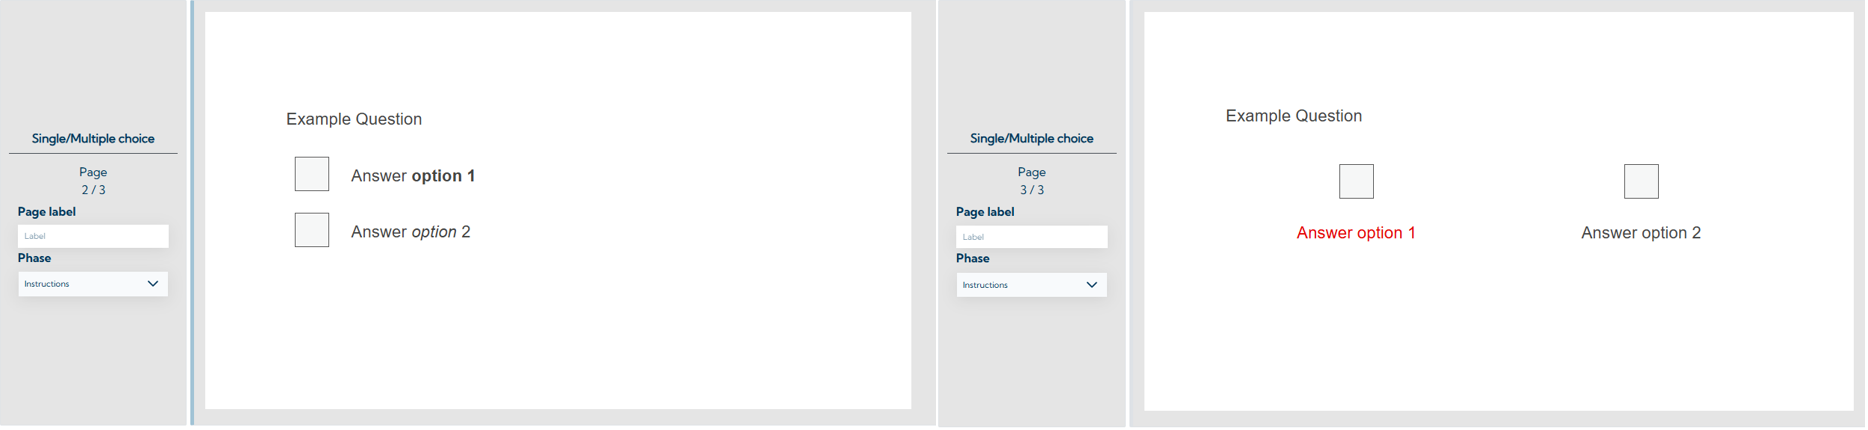
Single/multiple choice
This page allows you to create questions with correct or incorrect answers where the respondents must select one or more correct answer options. However, this page can also be used to create rating scale tests where no answer options are correct or incorrect.
For questions in rating scale format, it is important to set that no answer is correct. Examples showing how to evaluate rating scales can be found on the page Set the scoring.
You can also set whether the answers should be displayed horizontally or vertically and whether the participants can only select one ("single choice") or several answer options ("multiple choice"). Please note that you must set the answer modality to multiple choice if several answer options are correct, as otherwise the respondent will never be able to select all the correct options.
On this page, images can be added to both the question and the individual answer options.
Setting options
A text and/or image can be inserted in the Question field, which is displayed above the answer options.
On each single/multiple choice page, you can add answer options using the button ![]()
If the No correct/incorrect answers checkbox is selected, the answer options do not have to be marked as correct or incorrect. This allows you, for example, to create rating scales.
The field Text below the answer options can be used to display an additional text or note below the answer options.
In the Feedback section, you can enter a text in the field Feedback when an incorrect answer option is selected, which will be then displayed to the respondent if an incorrect answer was selected (or if the correct answer was not entered). As long as the feedback is displayed, the respondent cannot navigate to the next page. This option can be used to ensure correct understanding of the task/handling of the test during the instruction phase. In the test phase, the use of such feedback usually makes no sense. In the field Feedback when no answer option has been selected, a text can be entered which is then displayed to the respondent if they have not selected an answer option and try to navigate to the next page. This can be used to prevent test pages from being skipped. The respondent must then select an answer option in order to proceed to the next page.
In the Settings area, you can specify whether the response options are arranged vertically or horizontally (alignment of the response options), whether only one answer option can be selected (single choice) or several (multiple choice) and whether it is automatically navigated to the next page when an answer was selected (automatic navigation). Automatic navigation is only possible if single choice is selected.
Free text questions
This template allows you to enter a question or an image in an area provided for this purpose. There is a separate field below the question or image in which test participants can enter their answers freely as text. The person has 250 characters available for the answer entry.
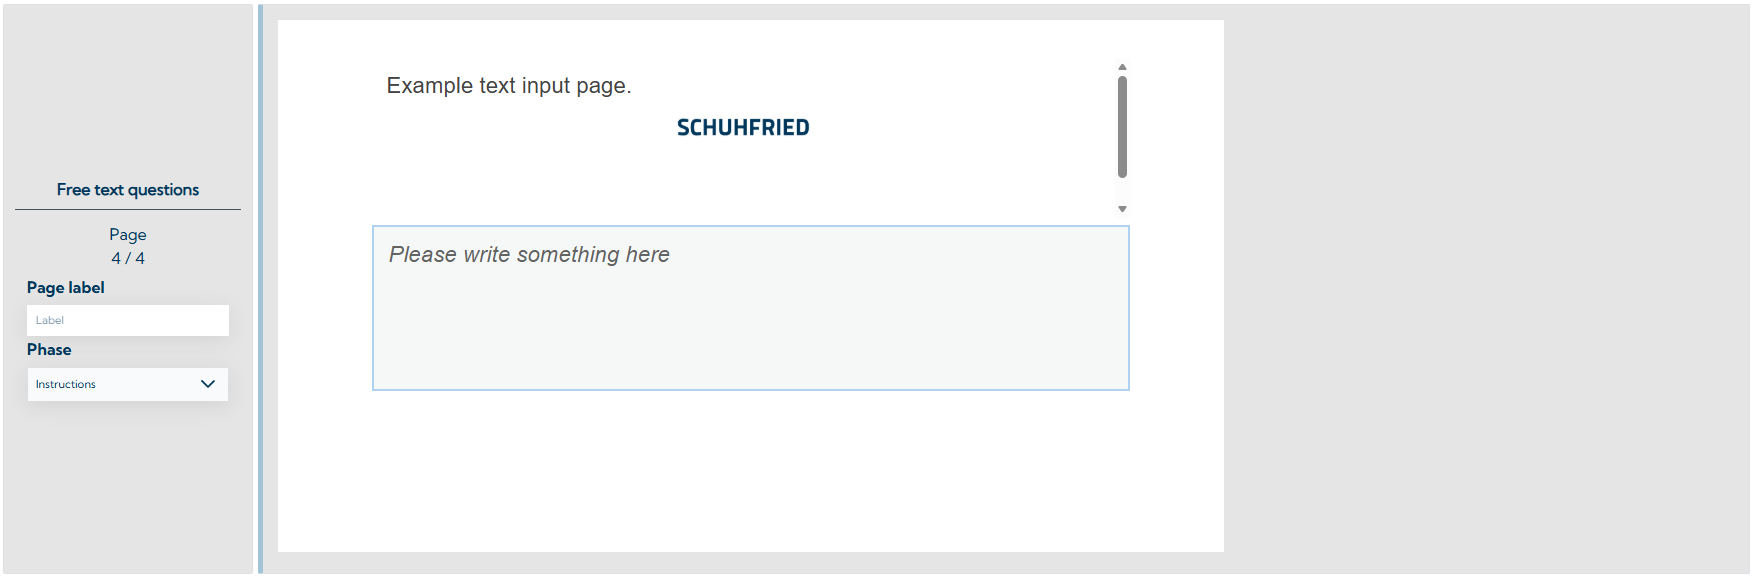
You have the option of pre-filling the answer field with a text, e.g. to prompt participants to enter their answers. This template is suitable for questions that require detailed, descriptive or explanatory answers (e.g. to obtain feedback).
The scoring of the entries for free text questions must be done manually.
Setting options
A text and/or image can be inserted in the Question field, which is displayed above the text input field.
The field placeholder for the answer field can be used to define a text that is displayed to the respondent in the answer field and disappears as soon as the person enters an answer themselves. This can be used, for example, to provide instructions on how to answer the question.
In the field Feedback when no answer option has been entered, a text can be defined which is displayed to the respondent if no answer has been entered. This can be used to prevent test pages from being skipped. The respondent must then enter an answer in order to proceed to the next page. However, the system does not check what answer is entered or how long it is.
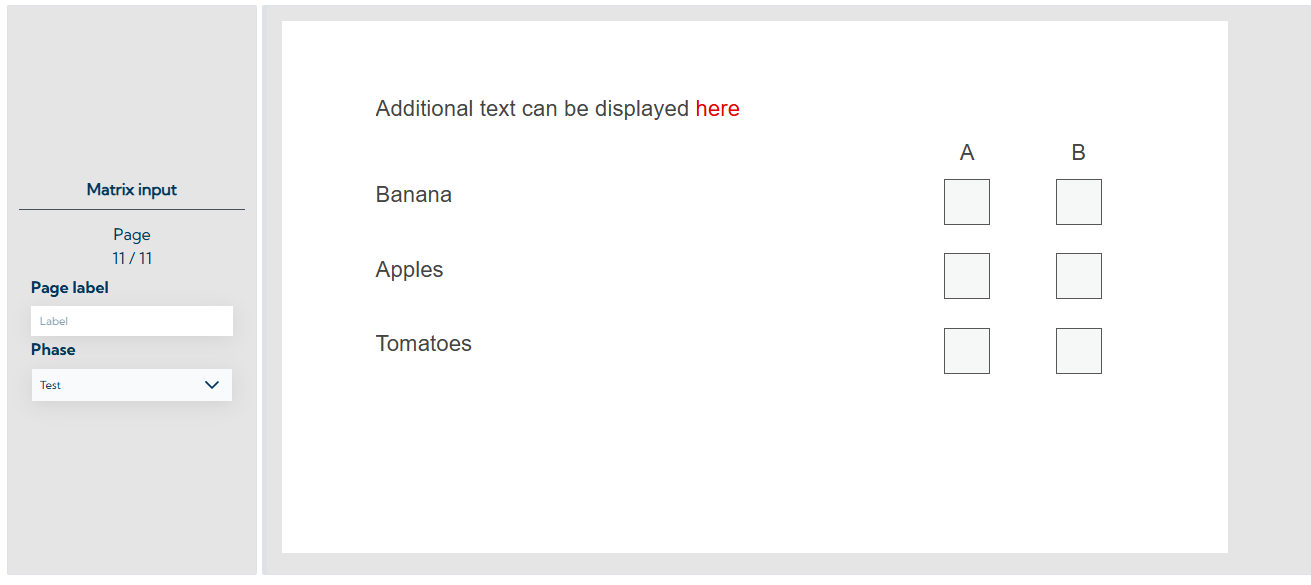
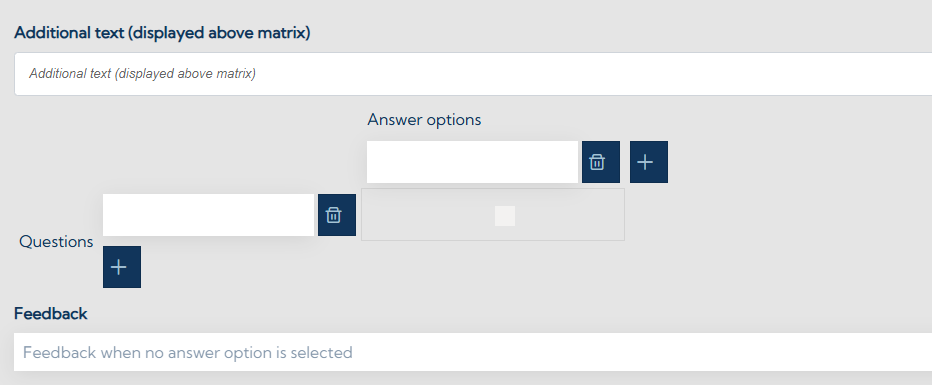
Matrix input
With this template, you can create a list of questions that are displayed in the rows of a matrix. The respondents can then rate these questions using the answer options shown in the columns of the matrix. Additional text, like a question or instructions can be displayed above.
Setting options
On the left-hand side, one or more questions can be added in the Questions section (plus button) and one or more answer options can be added in the Answer options section. The texts to be displayed for the questions and answer options can be defined via the respective fields. The answer options cannot be marked as correct/incorrect (for scoring examples see Set the scoring.
The field additional text (displayed above the matrix) allows to set a text or question that is displayed on the page above the answer / question matrix.
In the field Feedback when no answer option is selected, a text can be defined which is displayed to the respondent if an answer has not been entered for at least one question. This can be used to prevent test pages from being skipped. The respondent must then enter at least one answer in order to proceed to the next page.
Additional settings
Phase
For each page in the test, either "Instruction" or "Test" must be set in the phase drop-down menu on the left-hand side. Only the pages that have "Test" set as the phase are included in the scoring of the participant's test results. Instruction pages serve as instructions for the test and offer the opportunity to practice sample tasks but are not included in the scoring.
Page label
You also have the option of giving each test page a name in the Page label field. This gives you a better overview when you delete the test pages or select them for the calculation of variables when you define the scoring for your test.
Formatting options
Much of the content on the test pages (text, images) can be formatted by the user and its appearance adapted. The text color or size as well as the alignment (left-aligned, centered) for instance can be adjusted. To apply these options, the content must be selected with the mouse; an editor then opens where the settings can be made.

Add images
This editor (see image above) can also be used to add images. Images can also be dragged and dropped into the corresponding input fields, provided this function is supported. Standard image formats like .jpeg, .png, .webp and .gif are supported.
Attention: When adding images, it is advisable to ensure that the file size is as small as possible in order to avoid problems during execution due to long loading times of the individual test pages.
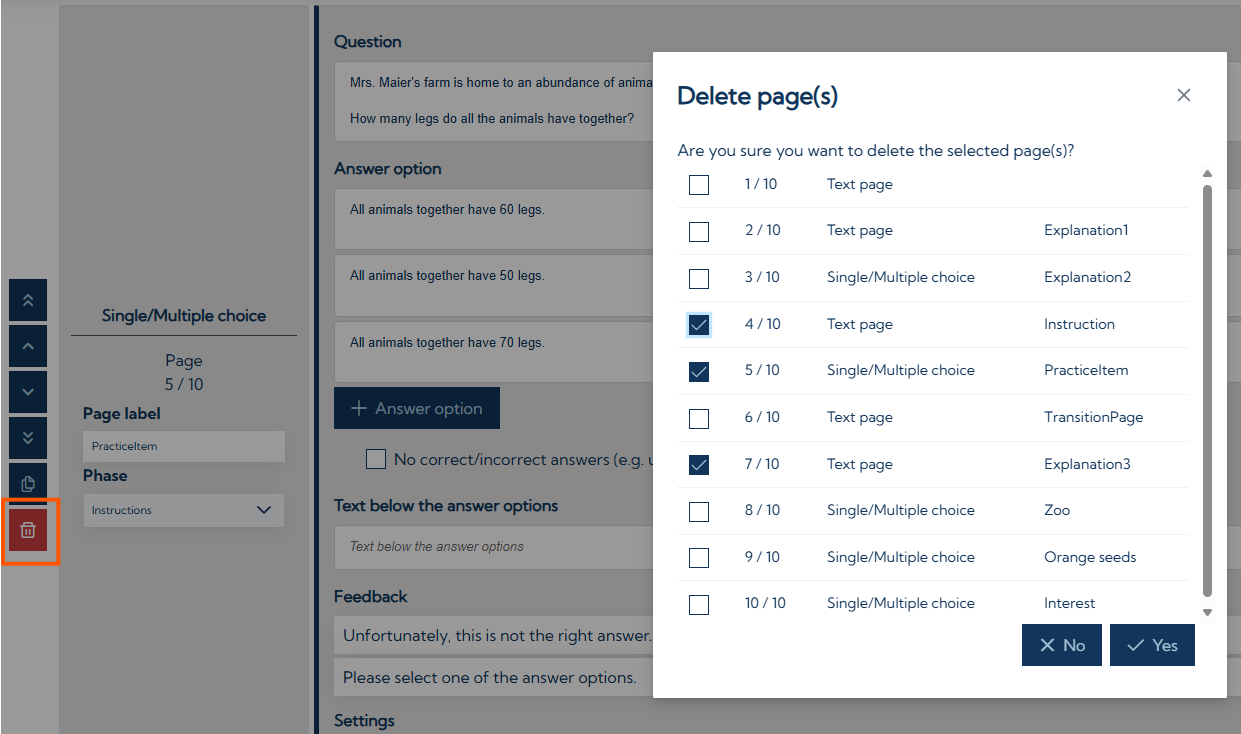
Deleting and changing the order of pages
You can delete one or multiple pages by selecting a page, clicking on the red “bin” button and selecting the pages for deletion. After confirming with Yes, the pages will be deleted.
You can change the order of the pages using the arrow up / arrow down buttons on the left side of each page (see image above). There is also an option to move a page to the beginning or the end of the test. The order of the pages in the editor matches the presentation order of the pages.
Next steps
When you are done creating the test content, you can continue with the setup of the scoring and the creation of the results report. Visit the pages Set the scoring and Create the results report for a guide on how to do that.